


Trail cameras are a widely popular solution to monitoring elusive or nocturnal wildlife for both professionals and wildlife enthusiasts alike.
Modern trail cameras tend to be very reliable and are designed to be highly user-friendly. However, there are a few things we would suggest to ensure your camera performs to the best of its ability. These are the initial steps we advise to take if you are experiencing issues with your camera, and these can often resolve or at least identify the problem. For tips on how and where to set up your trail camera, check out part 2 of this series.
Batteries
Try a set of new batteries
 Most minor troubles with trail cameras are due to the batteries not providing enough power. This can be down to the type of batteries being used or simply that they are getting low and need replacing. If you are experiencing black night-time images, short night-time videos, or no night-time captures are being taken at all then the first thing to check should be your batteries.
Battery meters on trail cameras are not always accurate, so we suggest checking your batteries with a tester/voltage meter prior to use if possible. This is particularly important for professional usage.
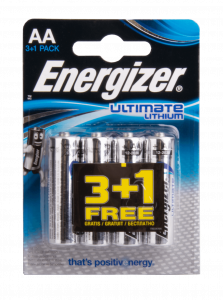
Choose Lithium batteries if at all possible
We, and many trail camera manufacturers, highly recommend Lithium batteries as the best option for performance. The Energizer Ultimate Lithium are particularly well thought of, and as such are included in our Starter Bundles (see individual product pages).
Lithium batteries have a significantly longer lifespan than most other types e.g. alkaline and rechargeable NiMH, while also performing more reliably for a number of reasons that are explained below.
Trail cameras generally require 1.5 volts (V) from each AA battery to perform at their full potential. When the voltage begins to drop you may start experiencing issues such as those mentioned above. One of the main benefits of Lithium batteries is that they maintain their voltage until the end of their usable lifespan when it then rapidly drops off. In contrast, Alkaline batteries experience a pretty consistent voltage loss throughout their lifespan, meaning they can drop below 1.5V rather quickly after deployment.
Unfortunately, we do not recommend rechargeable AA batteries (NiMH). At only 1.2V, rechargeable batteries are unlikely to power the camera reliably or for long. If rechargeable batteries are still the preferred option, it is important that the batteries offer at least 2500mAh. Some camera models have been designed to work more effectively with rechargeable batteries, for example the Recon Force Elite HP4, however the performance is still unlikely to be comparable to use with Lithium batteries.
Be prepared for batteries to die more quickly in cold weather
During colder winter months, you should expect your batteries to discharge more rapidly and the battery life to therefore be reduced. At lower temperatures the chemical reactions accruing in the battery are slowed down, diminishing its power.
Alkaline batteries are particularly troublesome in this regard as they contain a water-based electrolyte, which means they seriously struggle as temperatures approach freezing. Again, Lithium batteries are the superior choice and can withstand significantly colder conditions while still performing fantastically, albeit slightly diminished in comparison to use in more mild conditions.
SD cards
SD (Secure Digital) cards are available in a wide variety of sizes and speeds. Generally speaking, we find a 32GB, class 10 SD card a very suitable choice, and this is what is included in our trail camera Starter Bundles. It is worth reading the manual of your chosen trail camera to check for any compatibility requirements or maximum size capacities.
Format your SD card
Formatting your SD card is an important step when starting with a new camera, or if experiencing SD error alerts on your camera. It is important to be aware that formatting your card will erase all data, so any important videos or images should be transferred elsewhere beforehand.
There are two options for formatting your SD card: using a computer with an SD card reader or via the trail camera itself. When using a computer, simply look for the SD card in your file explorer/file finder, right-click and select ‘Format’. The majority of trail cameras also provide an in-built option to format your SD card via the settings menu. For the brands we offer, the menu options are likely to appear under the following titles (or similar):
Browning – ‘Delete all’
Bushnell and Spypoint – ‘Format’
Check your SD card is not locked
A common error message seen with trail cameras is ‘missing SD card’. If an SD card is inserted in the camera but the error message is showing nonetheless, it is worth checking if the card is ‘locked’.
Modern SD cards include a small plastic lock switch (seen on the left side of the image) that allows the user to prevent any data being written or images deleted from the card. Simply slide the switch into the unlock position and check if the error message disappears when you re-insert the card.
Settings
Return the camera to the default settings
When a trail camera is not behaving as it should or how the user would like, we would recommend resetting the camera to the original factory settings. This can be easily done through the menu on the trail camera and is likely to be named ‘default settings’, ‘default’, or similar.
For further advice on settings and placement of your camera, please see Part 2 of our Trail Camera Tips and Troubleshooting series.
Summary
We recommend taking the following steps prior to using your camera for the first time, or if you experience any unexpected problems:
- Use a brand new set of Lithium batteries
- Reformat your SD card (and check it is not locked!)
- Reset your camera to its default settings
If you have any questions about our range or would like some advice on the use of your trail camera, please feel free to get in touch with our Wildlife Equipment Specialist team via email at customer.services@nhbs.com.